Setting Up Email for the Apple iPhone- iOS 10
Before you start, please ensure that you have your email address, password, username. Also, you must have set up the internet before starting any steps.
Follow the guide below to set up your email on your iPhone (iOS 10).
Note: substitute “yourdomain.com” with your domain name.
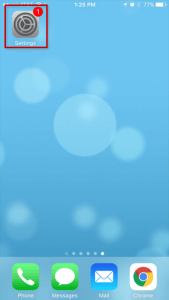
1) Firstly, tap the “Settings” icon.
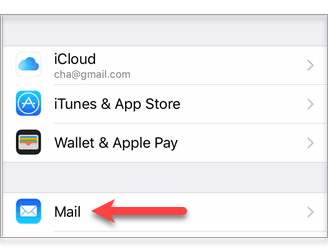
2) In the setting, tap “Mail“.
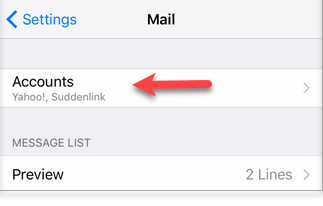
3) Next, tap “Accounts“.
4) Then, tap “Add account“.

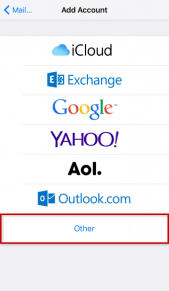
5) Tap “Other” to add your email account.
6) After that, tap “Add Mail Account” under MAIL.
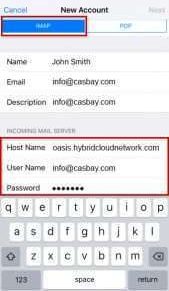
7) After going into New Account, please enter:
- Name
- address (full email [email protected])
- password
Note: iPhone will attempt to guess your settings. Allow ~1 minute for it to fail.

8) After that, select IMAP.
(It is the default. The option you’ve selected will be highlighted blue.)
9) Under “Incoming mail server”:
- Set “Host Name” to mail.yourdomain.com
(or your server host name or server’s IP address) - Set “User Name” to [email protected]
- Set “Password” to your password

10) Next, under “Outgoing mail server”:
- Set “Host Name” to mail.yourdomain.com
(or your server host name or server’s IP address) - Set “User Name” to [email protected]
- Lastly, set password to your password
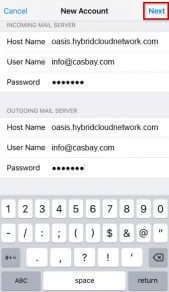
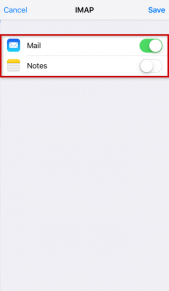
11) Lastly, click “Save” and you are now ready to send and receive emails via your iPhone.
( If mail.yourdomain.com is not working for the incoming and outgoing server, you can try your IP address or server’s host name. You can find your server name and IP in your welcome email or by contacting support. )
Your server host name would look something like infinity.casbay.net or something similar. Check your welcome email for the exact host name or contact support to find out what it is.
For the solutions to set up email on the iPhone with other versions of iOS, you can read the following articles:
Setting Up Email for the Apple iPhone- iOS 9 or earlier // Setting Up Email for the Apple iPhone- iOS 11 & iOS 12 // Setting Up Email for the Apple iPhone- iOS 13 & iOS 14.